

PlayStation
The PlayStation is the platform that best shows what RetroXR does with saves. Your save is not a hidden file in a folder — it is on a memory card, and the card is an object you hold, slot in, and can lose.
The BIOS is optional
Section titled “The BIOS is optional”You do not need a PlayStation BIOS to play. pcsx_rearmed declares all three region BIOSes as optional and emulates the firmware itself, so a game will boot without one.
A real BIOS is still worth having. It is more accurate than the built-in stand-in, it is what a few awkward titles want, and it is the only way to get the console’s own startup screen — the one that boots to the CD player and memory card manager when you power the machine on with no disc in it.
RetroXR cannot ship those files. Open CORES → BIOS / Extras and pick PlayStation to
see which ones it knows about, and which of them your chosen core marks as required.
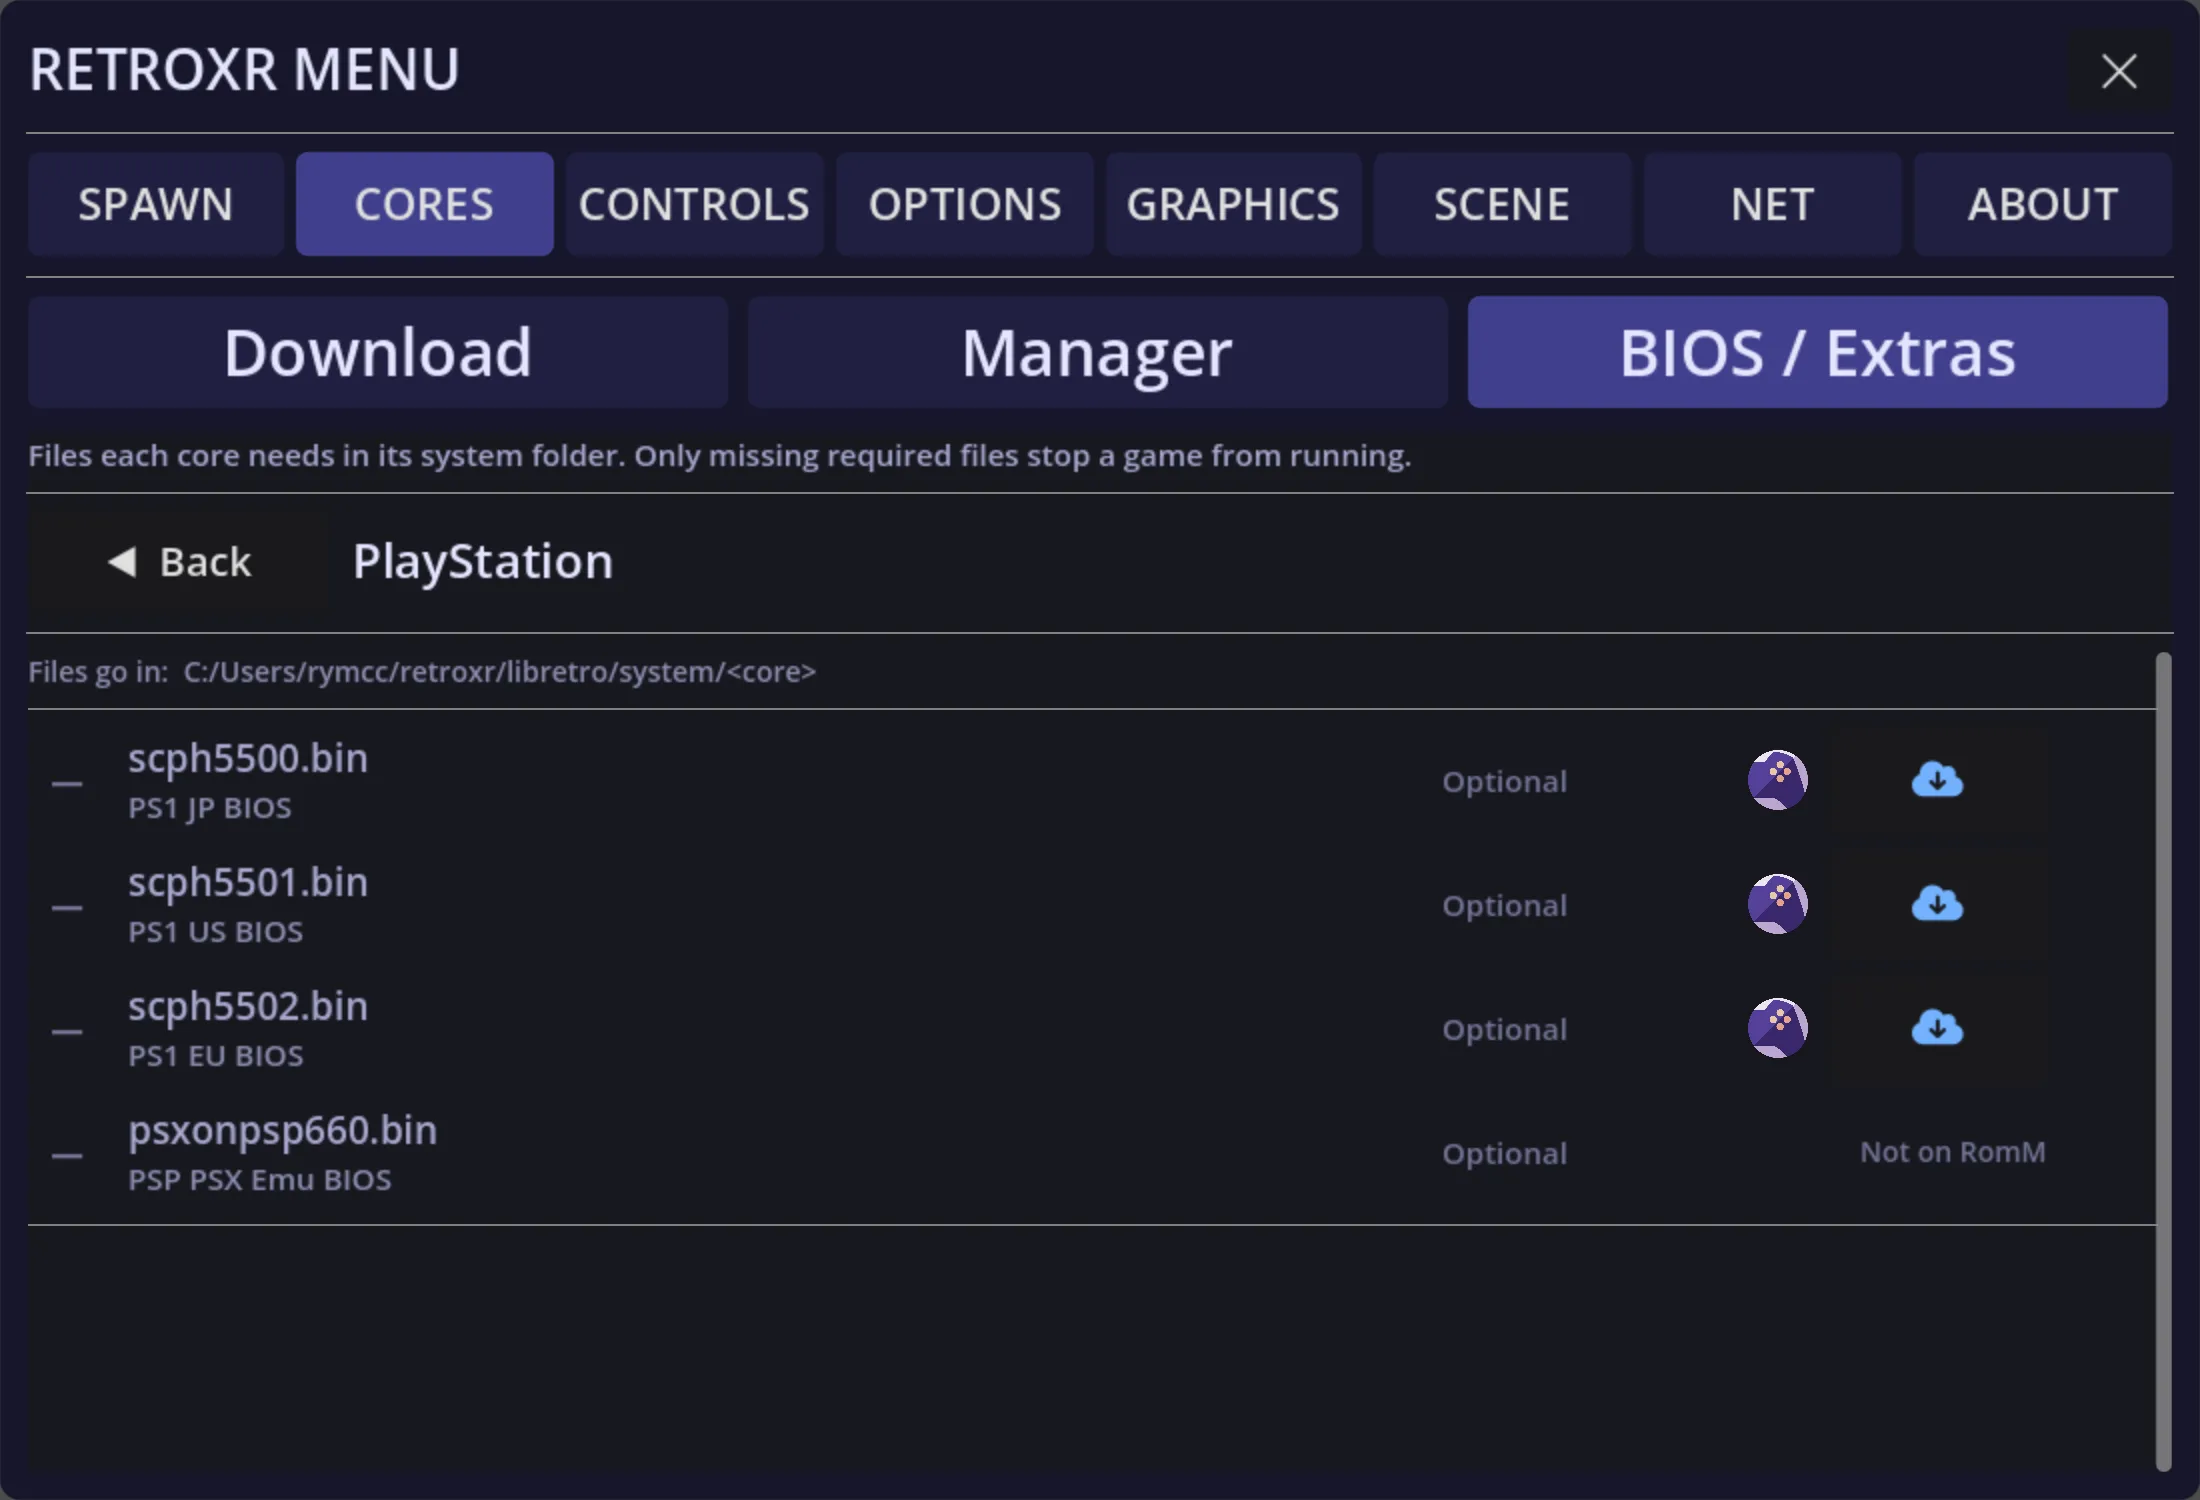
The filenames have to match exactly — scph5500.bin, scph5501.bin, scph5502.bin and
psxonpsp660.bin. A file that is right in every way except its name will not be found.
Required-or-optional is not RetroXR’s judgement: it is read out of each core’s own metadata, so a different PlayStation core can be stricter than pcsx_rearmed is.
If you run a RomM server holding your firmware, RetroXR can pull these down directly. Otherwise copy them in the usual way — see adding your games and BIOS files.
Memory cards
Section titled “Memory cards”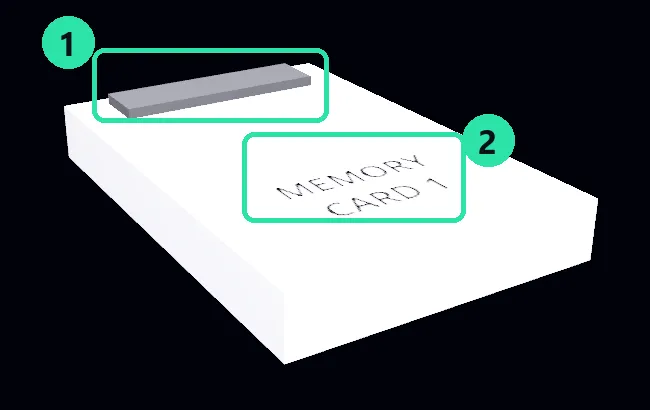
① The connector edge goes into the console’s card slot. ② The label names the card, which is how you tell two of them apart on a shelf.
Using one
Section titled “Using one”-
Spawn a memory card from
SPAWN→ Objects. -
Push it into one of the console’s two card slots.
-
Play. The game saves to that card, in that slot.
Because a card is a real object rather than a setting, the things you could do with a real one work here:
- Keep several saves on one card, until it runs out of blocks.
- Move a save from one card to another.
- Delete a save to free blocks.
- Back a card up to your RomM server.
There is a manager for all of this, reachable from the card itself: point at it and press clicking the left thumbstick.
As of v0.4.0 the running game notices when card slot 1 is emptied, the way the console did — pull the card mid-game and the machine sees it go.
Where a card lives on disk
Section titled “Where a card lives on disk”Each card is one ordinary .mcr image — the same 128 KB format any PlayStation memory card
tool on your PC will open.
libretro/save/memcards/playstation/<card name>.mcr| Platform | Full path |
|---|---|
| Windows | %USERPROFILE%\retroxr\libretro\save\memcards\playstation\ |
| Linux / macOS | ~/retroxr/libretro/save/memcards/playstation/ |
| Quest | libretro/save/memcards/playstation/ in the web file manager |
Two things about that path are deliberate and worth knowing.
The card’s name is its filename. Renaming a card in the manager renames the file, so the folder reads as a shelf of cards rather than a pile of hashes. Which also means the name has to survive being a filename — the manager strips characters your operating system would refuse.
There is no core in the path. Compare that with everything else under libretro/,
which is filed per core — BIOS, core assets, cartridge battery saves. A card is hardware,
and the raw image is identical for every PlayStation core, so a card follows you when you
switch cores exactly as a real one follows you when you switch consoles. Cartridge saves do
not; see the libretro folder.
Backing a card up to RomM
Section titled “Backing a card up to RomM” Backing a card up to RomM
A card you can lose is a card worth backing up, and this is the reason to connect a RomM server even if you copy your games across by hand.
-
Back the card up from its own manager.
-
The card’s contents live on your server, not only on the headset.
That matters more here than for most saves: on a Quest you cannot safely copy save files back in from a PC — files pushed from a computer land owned by the shell rather than the app, and RetroXR can no longer write to them. RomM is the route that avoids the problem entirely.
Full detail on game saves and backups.
Spawn a game from SPAWN → Games and it arrives as a disc rather than a
cartridge. Open the console’s lid, set the disc in the tray, close it, and power on.
Multi-disc games work — RetroXR retrieves the right image for each disc rather than handing every disc the first one, which was a real bug fixed in v0.3.0.
Multi-disc games can also be swapped mid-game on cores that support disc control: take disc 1 out and put disc 2 in, and the game carries on. Pulling a disc no longer switches the machine off either — see cartridges and discs.
Controllers
Section titled “Controllers”Both PlayStation pads are modelled, and which one you plug in is what decides how the console reads it — there is no controller-type setting to find.
Push either into one of the two controller ports on the front:
- The original pad selects the standard controller.
- The DualShock selects the dual-shock controller.
The ANALOG button works. Put a fingertip on it and press, and the DualShock drops back to behaving as a standard controller, exactly as the real one toggled — which is the fix for games that predate the sticks and get confused by them.
For a real gamepad, spawn a Controller Receiver and plug that in instead — see controllers and peripherals.
The serial link
Section titled “The serial link”The PlayStation’s SERIAL I/O socket on the back is wired. Run a link cable between two consoles and games that supported it will see each other — see link cables.
The PlayStation has several libretro cores with different accuracy and speed trade-offs.
Pick the default in CORES → Manager — see downloading and managing
cores.