
Downloading & managing cores
Everything here lives under the CORES section of the menu, which has three views.
Download
Section titled “Download”A scrollable grid of every system RetroXR knows about, each showing how many cores are available for it.
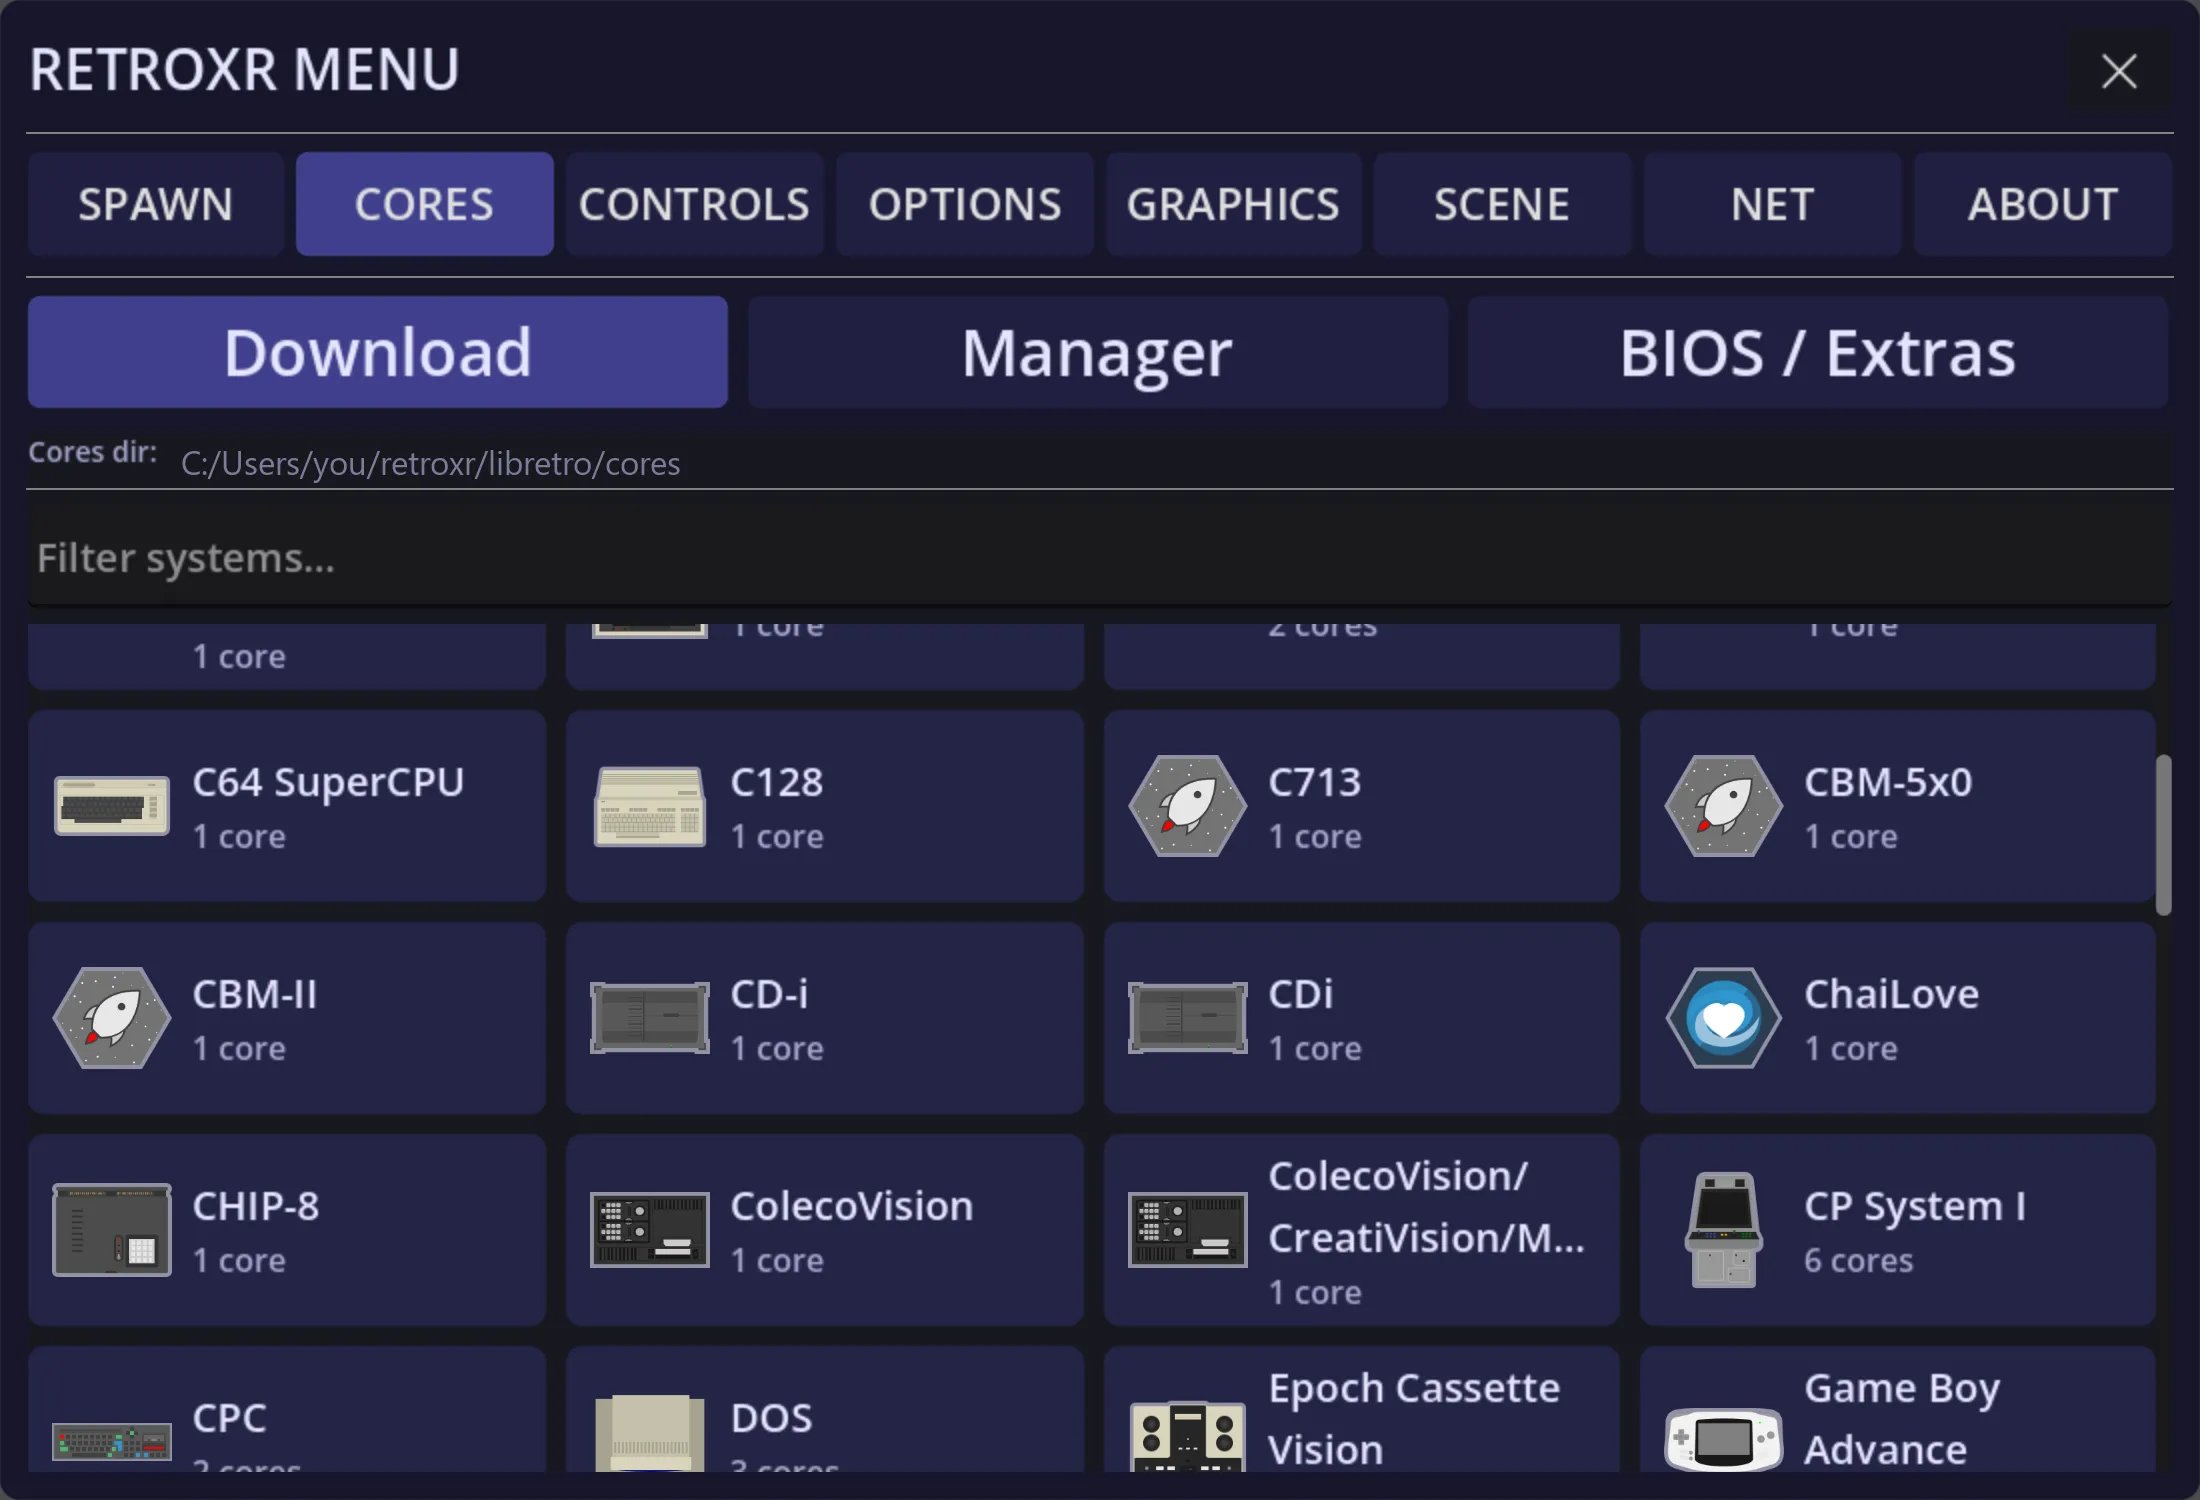
Pick a system, pick a core, and it downloads in the headset. No PC, no unzipping, no copying files.
Where a system has an obvious best choice it is marked recommended.
Manager
Section titled “Manager”Once you have more than one core for a system, this is where you say which one it launches with. Systems are shown as a grid, each labeled with its current default.
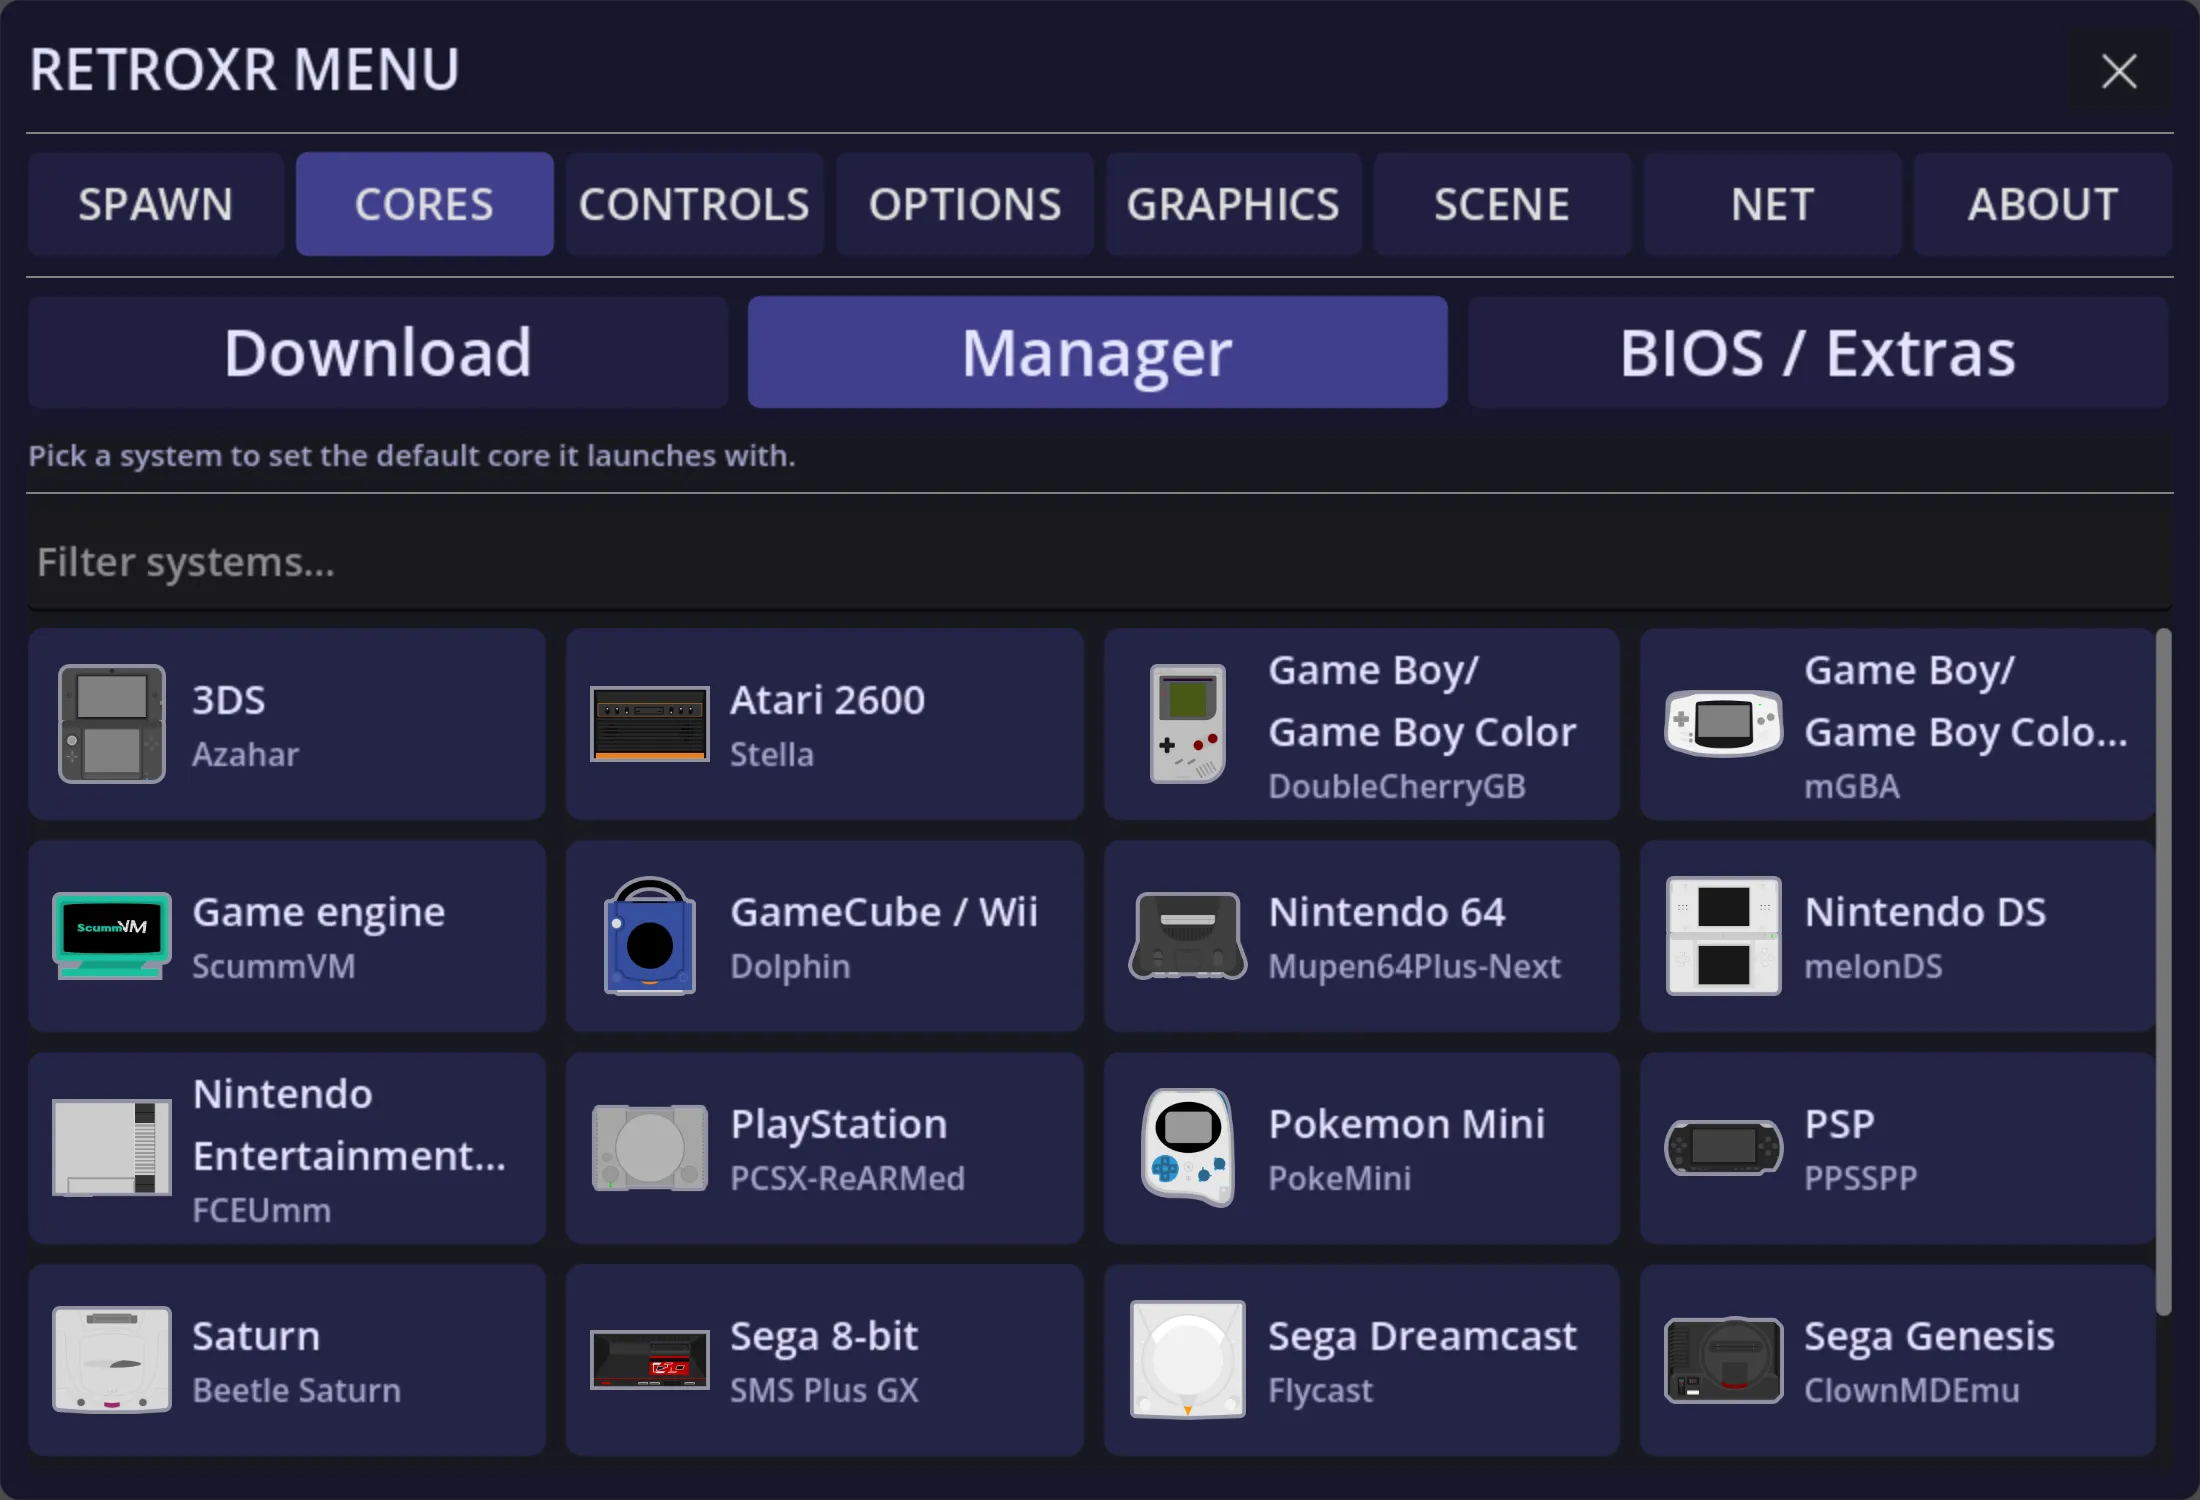
This is also where core options live. Every core exposes its own settings — region, video filters, accuracy trade-offs, controller emulation — and you can change them here, or reset them back to the core’s defaults if you have made a mess.
BIOS / Extras
Section titled “BIOS / Extras”Which systems need firmware, which files exactly, and whether each is required or optional. It has its own page.
Where all of this actually lives
Section titled “Where all of this actually lives”Everything the CORES section touches is written into one folder, libretro/:
| Platform | Path |
|---|---|
| Windows | %USERPROFILE%\retroxr\libretro |
| Linux / macOS | ~/retroxr/libretro |
| Quest | /data/user/0/com.xenu.retroxr/files/libretro — the app’s internal storage, browsable as libretro/ in the web file manager |
On Quest this is worth reading twice: libretro/ is not next to your games on
/sdcard. It is inside the app’s private storage, which is why adb push and SideQuest’s
file browser cannot see it. The web file manager is the way in.
What each folder is for
Section titled “What each folder is for”| Folder | What it holds | Do you touch it? |
|---|---|---|
cores/ |
The emulator cores themselves, one file each. | No. Download them here. A core dropped in by hand is never registered in the manifest, so nothing will use it. |
system/ |
BIOS and firmware, in a subfolder per core. | Sometimes — this is the one folder you may legitimately need to open. See BIOS files. |
core_assets/ |
Asset packs some cores need, also per core. | No — the downloader fills these. |
core_options/ |
Your settings for each core, written when you change something in Manager. | Prefer resetting from the Manager over editing the file. |
save/ |
Battery saves and memory cards. See game saves. | Back it up; don’t hand-edit it. |
temp/ |
Scratch. A core is copied here before it runs, so two machines can run the same core without treading on each other. | Nothing here is worth keeping. |
And three files at the top level:
| File | What it is |
|---|---|
cores_manifest.json |
What is available to download, and what you already have. |
core_defaults.json |
Which core each system launches with — what the Manager writes. |
firmware_state.json |
A hash cache for BIOS checking. Presence is always re-read from disk, so deleting this changes nothing except that files get re-hashed. |
The per-core rule
Section titled “The per-core rule”system/, core_assets/ and part of save/ are all keyed by core name, not by system:
libretro/system/mednafen_psx_hw/scph5500.binlibretro/core_assets/ppsspp/...libretro/save/pcsx_rearmed/<game>/<save>.srmSo installing a second core for a machine gives you a second, empty firmware folder. That is the usual reason a game that ran fine yesterday boots to a black screen after you switched cores.
Memory cards are the deliberate exception — see the PlayStation.
Updating and removing
Section titled “Updating and removing”Cores can be re-downloaded to pick up a newer build, and removed when you no longer want them. A system with no core installed simply cannot be spawned — that is the constraint you are managing.
Since v0.4.0 you can delete cores and BIOS files from inside the headset, from the same screens you installed them on, rather than going back to a PC to reclaim the space. The storage screen will also clear out orphaned metadata — box art and scraped details left behind by games that are no longer there.