

NES
The NES is one of the few machines in RetroXR wearing a detailed shell rather than a procedural stand-in — and it is the only one that molds a working RF panel, which makes it the best example of how a pre-composite console reaches a television.
Two ways out, both live at once
Section titled “Two ways out, both live at once”This is the part worth understanding. The NES carries two outputs, and they work at the same time:
- A phono pair on its flank — mono composite. Video plus a single audio channel.
- An RF SWITCH jack on its back, with a CH3/CH4 slide switch beside it.
You can run a composite lead from the flank to one television and an RF switch from the back to another, and both sets will show the picture simultaneously. Neither output disables the other.
Route 1: composite
Section titled “Route 1: composite”The simplest path, and the one to use if your television has a spare phono row.
- Spawn a Mono Composite Cable from
SPAWN→ Objects. - Plug one end into the phono pair on the NES’s flank.
- Plug the other into any Composite block on the back of the set.
- Set the TV’s Source to that input.
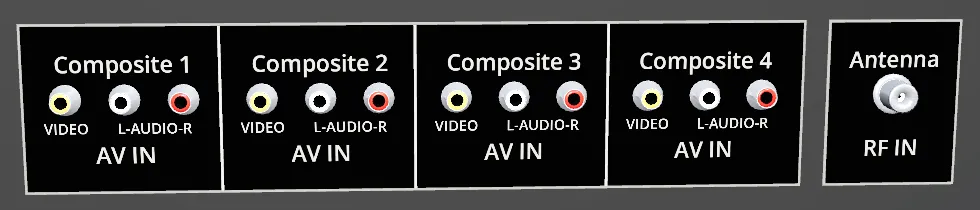
Note it is mono composite — video plus one audio plug, not the yellow-white-red trio. It seats in the same row; there is simply one fewer plug.
Route 2: RF, through the switch box
Section titled “Route 2: RF, through the switch box”The way most people actually had it. The chain is:
NES RF SWITCH jack → RXR-003 switch box → TV ANT / RF IN- Spawn an RF Switch (RXR-003) from
SPAWN→ Objects. - Plug its phono lead into the NES’s RF SWITCH jack.
- Plug its coax lead into the television’s ANT / RF IN socket.
- Set the TV’s Source to the antenna input.
- Tune the set to channel 3 or 4 — whichever the console’s slide switch is set to.
The front panel
Section titled “The front panel”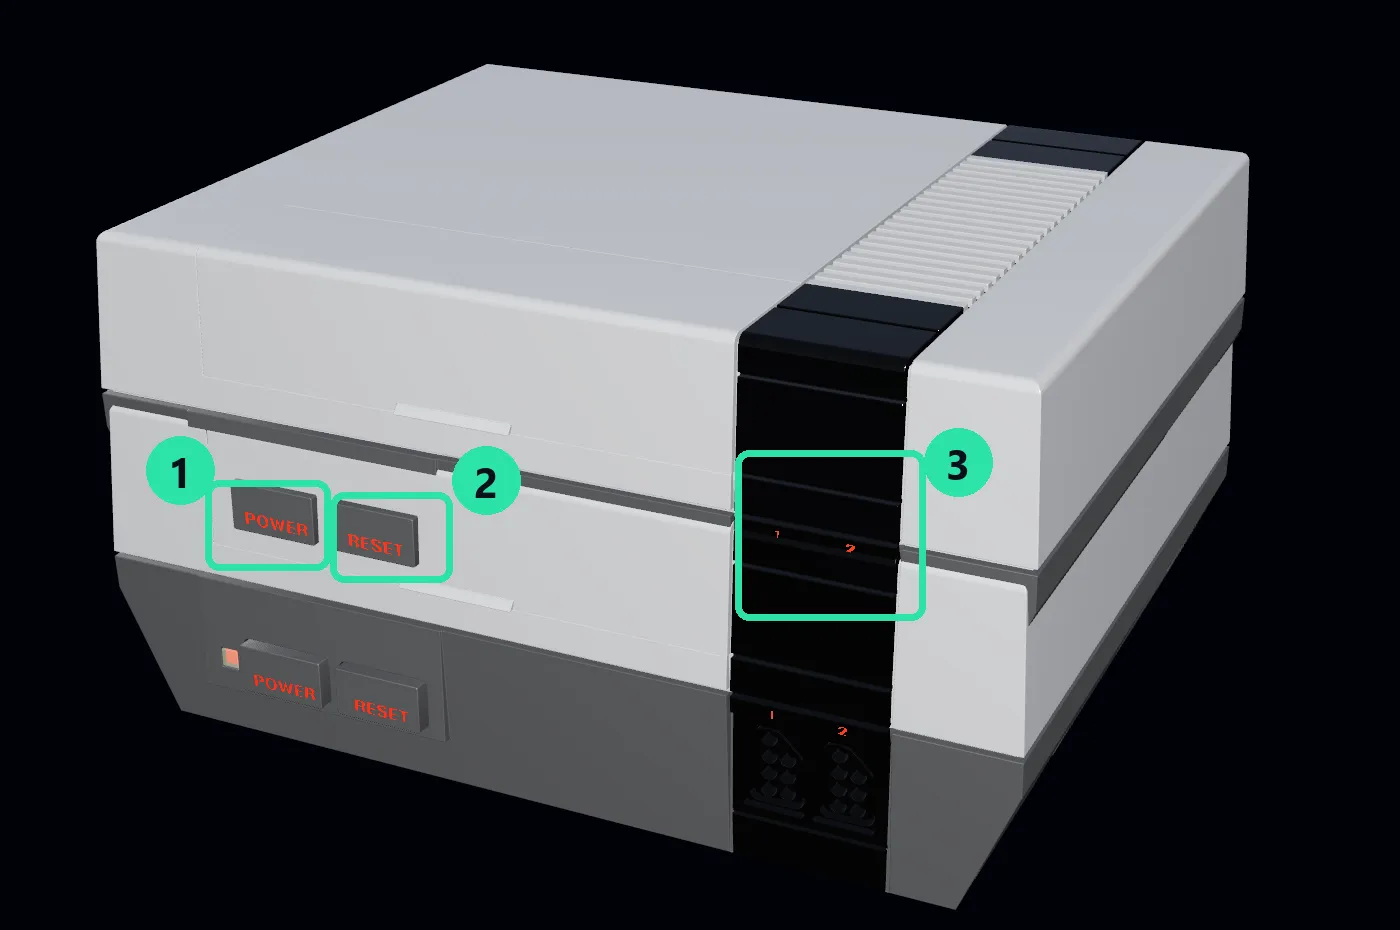
① POWER · ② RESET · ③ two controller ports
The POWER button gives off its own red light when the machine is on, rather than being painted red — so a console that is on reads as on from across the room.
It sounds like one
Section titled “It sounds like one”v0.4.0 added recorded hardware sounds to this machine, taken from a real NES-001: the power and reset buttons, the controller buttons, a controller plug going into a port, the CH3/CH4 switch, a cartridge going in and coming out, and the cradle latching and unlatching.
Cartridges, and the lid
Section titled “Cartridges, and the lid”The NES is front-loading, and the bay sits behind a hinged flap. You cannot put a cartridge in — or take one out — while the flap is down.
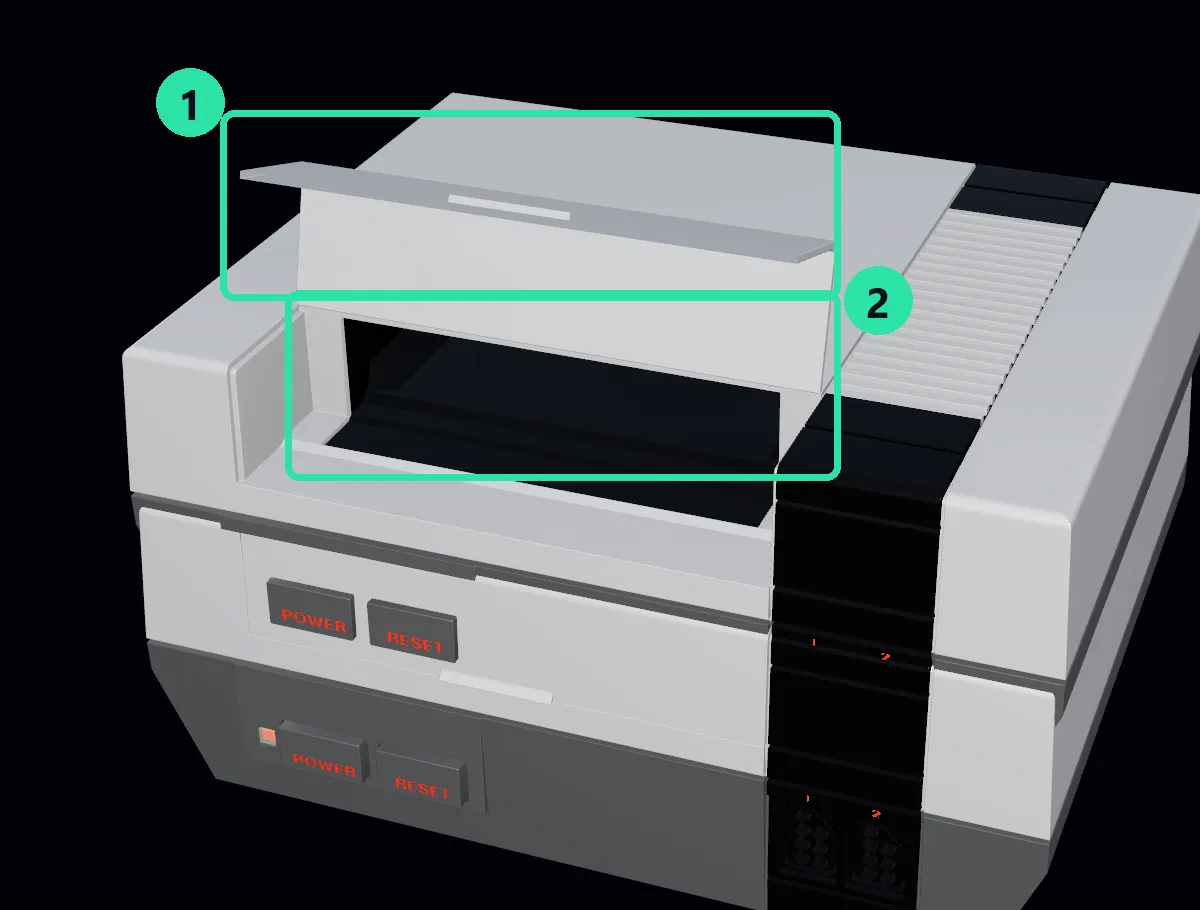
① the flap, swung up · ② the cartridge bay behind it
Opening it
Section titled “Opening it”As of v0.4.0 the flap is a poke: put a fingertip under it and lift. No grip, no trigger.
- Poke the flap up.
- Spawn a game from
SPAWN→ Games and push it into the bay. It goes in label up. - Press the cradle down. The NES’s bay is sprung: a cartridge sitting in it is not yet connected, and the console cannot see the game until you push the cradle down and it latches — the clunk everyone remembers. Press it again to unlatch and pop the cartridge back up.
- Press POWER.
You do not have to do the flap by hand every time: inserting or removing a cartridge drives it automatically. Opening it yourself is for when you want to look, or to get a cart out that you did not spawn with.
The controller
Section titled “The controller”Two controller ports, so two pads for two players. If you would rather use a real gamepad, spawn a Controller Receiver and plug that into a port instead — see controllers and peripherals.
There is also a Zapper light gun for the games that used one.
Troubleshooting
Section titled “Troubleshooting”| What you see | Usually means |
|---|---|
| Snow on the antenna input | The set is tuned to the wrong channel for the console’s CH3/CH4 switch |
| Nothing at all | The set is on a different source, or the plug is not seated |
| Picture but no sound | Mono composite has one audio plug — check it is in, and check the set’s volume |